Don't miss out on these other pages!

Class Schedule

(502) 370-7632 Joani

Please call or email us to reserve your spot.

Wednesday, September 29, 2010

For the love of scrappin' x2

Thank you everyone for the sweet comments and emails about my last set of pages ~ that's so kind.  It makes me think that the album will be cherished.  Now, ready for the last of the pages?  Of course, that's why your here...


I have an appointment tomorrow so I'm not sure if I will be able to post here or not.  If not I will try to on Friday!  Have a great day and thanks for looking Ü

Tuesday, September 28, 2010

For the love of scrappin'...

As I mentioned before I've been busy making a scrap book for a friend.  And I normally would of been done with it in no time ~ but every time I tried to sit to work on it there was a little of this and a little of that.  Always something to get in the way.  Well yesterday was the perfect day.  Hubby was at work, Danielle was out with her boyfriend and Mom was just quiet in her chair.  It was a gloomy, rainy day.  We need the rain, badly.  But when it's a gloomy, dreary day people tend to be a bit quiet - so I got to finish my project.

When I sit to work on scrap pages I tend to bring out everything, and it get's messy.  So if you see these pages and there is something that you like and want to know who the vendor is just ask.  I'm sure that I can tell you ~ but I just don't keep track of it while I'm working.  It's messy enough Ü


I forgot to mention that these pages are 6 x 6.

I hope that you enjoyed these pictures and that they give you some inspiration.  Even if your not a scrapper you can still find inspiration in them.  You can't imagine the places that I find inspiration for cards.

Stay tuned tomorrow, I have more pages for you to look at!

Have a super great day!

Monday, September 27, 2010

World Card Making Day


This will be the 5th annual World Card Making Day.  Wow, time flies by.  I remember the 1st one, I entered a contest that Paper Crafts magazine had.  I didn't win, but with all the wonderful card makers out there it's no wonder.  But I still played.  I sit and think of all the cards that I have just sitting around here.  I send a lot out and donate too - but my goodness.  

It's about celebrating the art of card making and us card makers.  But it is also about celebrating the holiday card making season.  Some people start on their cards early in the year, some all year long.  Me ~ I'm one of those who wait.  I don't know why, it's not like I'm a busy person.  But I do procrastinate. 

Right now I am working on a scrap book for a friend who had a little baby girl.  I don't get to play around with the baby papers too often so I'm having fun.  I should be done with it today so I will show you some pictures tomorrow.

Take a minute to check out the Paper Crafts article on World Card Making Day.  I'm sure that you will find some inspiration to play!
     
Have a super great day and I promise to be back tomorrow. 

Wednesday, September 22, 2010

Mini Milk Cartons

I know that I've made the milk cartons before ~ actually they are one of my favorites to make ~ but these are just a little different.  These are mini milk cartons.  Betty brought over a little carton that she had juice in once and said that she'd like to have some of those made up if I could make a template.  So I thought that was easy enough.  WRONG!  I tried to make the template but when I took the carton apart it was just not working for me.  Then I thought "dummy!  Just take the template that you have and just make it smaller!"  Really?  Sometimes I scare myself - I just know that Danielle uses my hair brush sometimes Ü

So that's what I did.  I just "mini"mized it...
Adorable huh?  I used Wild Wasabi and Soft Sky to make the base cartons.  I also added a little handle to it and attached it with eyelets.  I stamped the flowers from my Fresh Fillers set with Old Olive and Ballet Blue inks then I sponged some Close to Cocoa around it to give it a "weathered" look. 

I made the "flower" from some Georgia Peach DP and used my scallop circle and small oval punches and added a sucker to it for the flower bud and I was complete. 

Here is a close up of the "flower".

These are really fun to make - I've always liked making the milk cartons.  Now the mini ones are so adorable I just might make those, and the handle is just adorable too!  Maybe since we really don't get too many tick or treaters I can make these for Halloween.  I would of loved it if Danielle brought one of these home in her trick or treating years, and yes - I would of taken candy from my child Ü  Ok, not the candy just the container...

I have company coming tomorrow to craft.  A friend who I met on line years ago and she stopped by last time she was thru Kentucky - well this time she mentioned stopping again and I thought instead of going to lunch to have her over to craft for a while.  So that's what I will be doing tomorrow.  I will have pictures on Friday to show you. 

And on another note:  I want to say Happy Anniversary to my wonderful hubby.  These past few years have been trying on us but we are still here and I love you very much!

Happy crafting and I'll see you Friday!!

Tuesday, September 21, 2010

Everyone loves babies!

I just love to make baby stuff ~ it's so much fun.  But I don't get to make it often enough.  So when hubby told me that one of the ladies at his cardiac rehab is pregnant I jumped at the chance to make something!!  I knew that I would make some of the baby onsie cards that are so much fun and easy from Lauren Meader.  I actually can make them without looking at the directions any longer.  And I wanted to make a card carrier to put it in ~ so here it is...

Here I made the card - the bib - for her and the box to fit the onsies in.  The box is made out of 1 sheet of Ballet Blue paper that I stamped with a stamp from my Fresh Fillers set in Ballet Blue ink.  I used the image from my Punches 3 set that I also stamped in Ballet Blue ink on to a white piece of card stock.  I wanted the handles to be a little more sturdy so I used eyelets to secure them to the box.  Inside I just cut a clear box in half lengthwise to keep the cards and envelopes secure. 
Here is the card I made for her.  It's my first.  I've seen lots of the bib cards around and I've not made one yet so here is my try.  I used a white base that I cut out with my scallop circle die from SU! and then I used my coluzzle and cut the Ballet Blue circle.  To make the card hinged make sure that you fold your card stock in half first and make sure that you don't put it all the way to the top or you will cut out 2 scallop circles.  I stamped the little marks in Ballet Blue from my Fresh Fillers set and then stamped the sentiment in Black from Curvy Verses.  I used my large oval punch to make the neckline.  Then I added a length of ribbon between the white and blue panels and then I glued buttons over the top. 
I made a total of 10 onsie cards for her.  I figured that she can use them for announcements, thank you cards or even shower invites if she has not had a shower yet.  I forgot to take a picture of the inside ~ I took white paper and just made a "mini" onsie for the inside, so she can write on it. 

I am so anxious to have her get them.  Now, I just need someone else to have a baby so I can make more.  Anyone, anyone??  nope, not me - I'm too old Ü

I hope that you have a super great day!  See you back here tomorrow!

Monday, September 20, 2010

A Day Late...

Ok, a little more than a day late ~ but at least I did it.  Actually I did it last Thursday so I'm not that late.  The sketch from Splitcoast last Wednesday.  Here is the sketch:
This is just right for me ~ since I've been called layer Queen.  So here is my take on the sketch:
The last time I went to Hobby Lobby I found this ribbon there.  Of course they only sold it on the spools that you have to have cut, so I bought a few yards.  I keep looking at it and don't want to use it - like most of my ribbon.  I guess I'd rather look at it than use it - so it looks pretty in my jar Ü

The card base is Bashful Blue that I layered with Certainly Celery, Pixie Pink and some DP from Bo Bunny.  The stamp I used was from The Angel Company called Everything is Blooming.  The layers that the image are on are cut out with my scallop oval and oval nesties.  I hand cut around the image and pop dotted her to the card.  I used my Devine Swirls embossing folder on the Pixie Pink layer to add a little more dimension.  The ribbon is attached with zip dry paper glue (love that stuff!!).  I added some stickles here and there to the image and I was complete.  I hope that you like this bit of inspiration ~ I made this card for a dear one that's over the pond...

Tomorrow I hope to show you a little something that I made for one of the nurses at hubby's ♥ rehab.  I hope that she'll like it.  Have a super great day today and happy stampin'!

Friday, September 17, 2010

Test Tube Friday!

Yippie ~ it's Friday!!  That means that tomorrow is sleep in day and breakfast day!  Hubby makes breakfast on the weekends and it's always so darn yummy! 

Since his heart scare in May he's limited to 2 eggs a week and I will tell you that he looks forward to those 2 eggs.  So on the weekends he makes breakfast for us, and it is wonderful.  Last week I looked at his plate and noticed 3 eggs in it ~ he gave me this story that the egg he cracked was a double yoke.  I did not think fast enough to ask if it was the 1st or the 2nd egg that he cracked, I'm sure that I could of caught him off guard.  But I let it slip.  You really do not learn to appreciate life until there is a scare and then it all clicks.  It falls into place and you realize that life is precious and you have to take care of yourself - for you and for your loved ones.

Ok - enough of that.  We are here to get crafty, right?

I have a little known secret tip for you.  (Rita, don't kill me....)  A dear friend of mine sent me some "test tubes" the other day - but they are not the ordinary test tubes.  They are the water vials that are at the end of flowers when you buy them.  It kinda looks like this...
Now this is just a picture that I got off line because I did not take a picture of them, but it is similar to it.  Yes, there is a small hole in the top of the cap - but that is nothing that a 1/2" punched circle will not take care of.

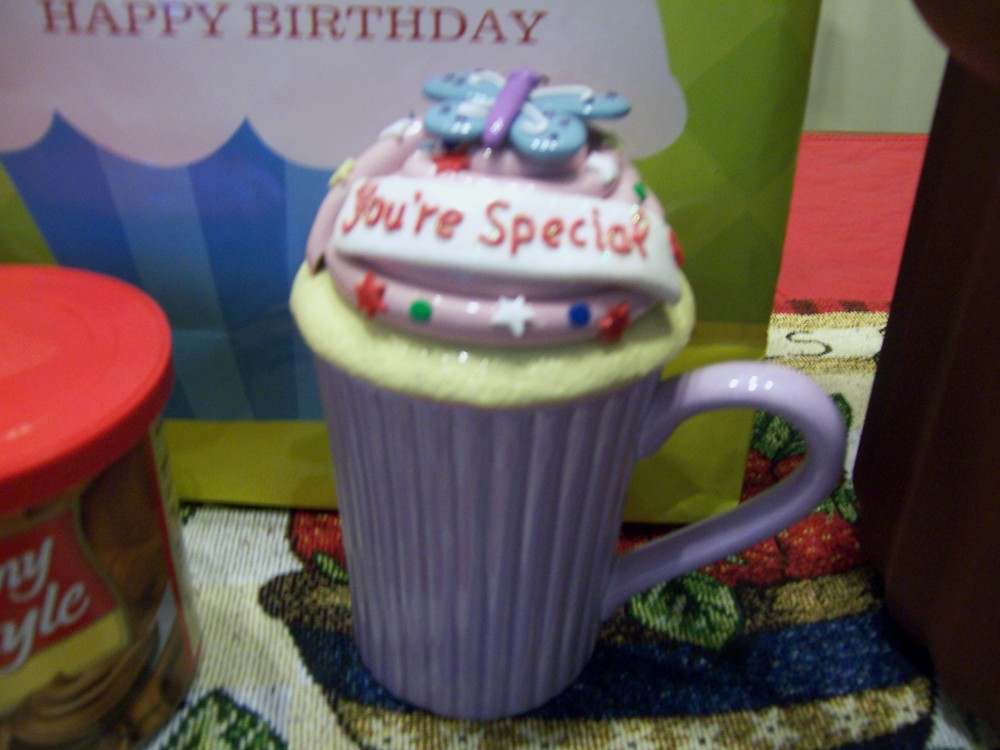
There are so many little things that you can do with these.  I like them because they are not so big that it will not take that much to fill them.  Especially if you put things in them say for cupcakes Ü

Or you can do something like this that I found on Stampington.com
How cute would that be to make a personalized box for someone?

Now I did not get the place where she purchased them from - she's keeping her source close to ♥ but when I did a search online for an image of flower water vials quite a few came up.

The pictures of the test tube holders that I made are not to fit those, but I wanted to show it to you anyway.
I made these a while back.  This one is for a boy.  I can not find my info on who the paper is from, sorry.
As you can see it holds 6 of the long test tubes.

This one I made for a girl ~ isn't that so cheery?  I wish I could tell you where I got that paper from, I'm sorry.
I will be playing with my smaller test tubes in the next week or so, so I'll post those for you to see.  In the mean time do a google search and you'll find the smaller vials.  I'm sure that if you are anything like me you will be able to find some creative way to do something with them.

Have a super great day!

Thursday, September 16, 2010

Happy Retirement

The other day Danielle asked me to make a card for a lady at her work who was retiring.  She had been there for 18 years!  WoW ~ I could not imagine that!

So here is the card that I came up with.  I'm sorry for the photos - it was getting late by the time I finished and of course my camera had a mind of it's own that evening. 
The base card is Barely Banana that I layered with some Soft Sky and DP by Prisma.  I stamped the images from Roses in Winter and I do not remember all the colors I used.  Barely Banana, So Saffron, Pink Passion, Regal Rose, Bashful Blue and Mint Melody.  Those I do remember.  And I know that when I use this set I sometimes stamp the image off on scratch paper then on to the card to give it a little more subtle look.

The leaves are from SU!  It is the Little Leaves Sizzlets Die.  I use that one a lot.  I punched out the flowers with some Sizzlits dies in various sizes and "distressed" them.  Basically I sponged some ink around them and on the back - since the paper was only one sided - and I crumpled them up.  After I crumpled them (that's my technical term.  he he he....) I opened them up, but not all the way, and stacked them on top of each other.  I stacked them kind of askew and then punched a hole in the middle just with my paper piercer and attached them all with a crystal brad.  That was it, all done.  I adhered them to the card with with the big fat glue dots that SU! used to have - I'm going to miss those.
Sorry for this picture, it's fuzzy - but you get the idea.  It is a little time consuming to make these flowers but they just turn out so pretty. 

So what are you up to today?  I hope that you have a super, great crafty day!

Tuesday, September 14, 2010

Sniff, sniff... Don't cry...

I have wanted to make some little tissue boxes for a long time and although these are not the ones that I wanted to make I still think that they turned out cute.  And of course I can not find the info on them as far as what colors and paper I used.  I can tell you that I did not have any tissue images in my stamp collection anywhere ~ or just could not find any.  So I went on line (of course) and scanned some clip art and came up with this image.  I think that it fit the little box perfect!  I can tell you that I cut the panel below it out with my Cricut and my Storybook cartridge.  It's my go to cartridge for a lot of things, I love it!
I hope that this inspires you to create something.  How cute would this be to give to someone who's a little under the weather.  Or if your out and you pull this out to give a tissue to someone who needs it, it would be a conversation starter for sure.

Sorry this post is a little short today ~ but to be honest, I've got things to do Ü  Have a supre great day!

Monday, September 13, 2010

Another little tote purse

I am addicted, I can't help it.  My name is Joani and I'm a paper-aholic.  It's awful.  I love paper, I love paper, I love paper!!  And I love to create things with it!!  The problem is I don't have the room for everything that I create, and now with Danielle being out of school she can't give it all to her friends.  So look out, you just may get it in the mail Ü

I actually made these for a friend ~ so I don't have to stick them on a shelf and dust them.
Are these not the cat's pajama's??  I just love them!!  I found the template on SCS a while ago.  The are a creation from Leigh O'Brien called her Toteally Totes.  When I see something that I like I print it out and make a template out of thin chipboard ~ this one I didn't as you can see.  I printed it out directly on to the card stock, and you can see the score lines ~ that's why I sponged the ink around them.  But they are still adorable!
The paper used to make these is Pink Passion, Glorious Green and Orchid Opulence.  I inked up the totes with Glorious Green, Pink Passion and Lovely Lilac and used the Vintage Vogue set.  Leigh's instructions called for brads but I prefer eyelets when making something like this - I feel that they have better staying power.  So I used my crop-a-dile and some big eyelets to hold it all together.  You like??  And they are perfect to cold little trinket's or a little chocolate - something for everyone Ü

I'm working on some more projects to show you - but I do have some Halloween cards in the works also.  So I will be back tomorrow with something else!  Have a super great day!

Friday, September 10, 2010

Some birthday goodies...

I know, you want to see some paper crafting and cards don't you?  But I just had to share with you the goodies that I got for my birthday.  Of course it was cuppy cake related Ü
Cute, cute cuppy cake stuff!
Look at the adorable mug that Betty gave me.  Isn't it special!?  I don't know to use it or just to look at it ~ it's so cute!  And she came to town early to take me to breakfast ~ how sweet was that!  Considering that she had to get up early to get ready and drive here.
All I could do was smile and say "I've never seen anything like this before".  I've made cuppy cakes for Danielle to take to school and hubby to take to work and you can never pack them up without mushing them together ~ so this is perfect!  It holds 3 layers of cuppy cakes, 24 total.  So I told hubby that I was going to make cup cakes for him to take to work, he said "great"...  Meaning "I really don't want to carry that into work".  he he he....
She bought it at Ginny's on line.  It's their cupcake carrier.  Oh, I just cant wait to use it! 
Then she bought me the decorator bags, tips and some cuppy cake papers too!  Not to mention some mixes, frostings and sprinkles.  Hey, maybe she wants me to make some cup cakes?
Kind of a funny story...  In our house the birthday person get's to pick out what they want for dinner that night, going out or staying in, a balloon and their cake.  Well, Mom made a blackberry pie last month and it was so good that I wanted that.  I like them kinda tart too ~ Ricky doesn't.  So he came home after work with this cake because he didn't want pie Ü and also....
This little guy.  It's 2 cup cakes covered with frosting to look like a puppy!  How cute is that?

Well, I'm done now.  Hope I didn't bore any of you with this post.  I just wanted to show off how lucky I am to have a wonderful family.  They really made this old girl feel special.  And thank you everyone who sent cards and sweet comments and emails ~ I find it harder every year getting older, but the love you all share is so kind that it puts a smile on my face.

Next week I promise to be back to normal with posting.  Really.  Have a super great weekend!

Tuesday, September 07, 2010

Your Wagon dimensions

Hi Everyone ~ I hope that today finds you well after the weekend!  It was nice to have a long weekend to spend with family AND have the weather on our side.  It was so beautiful this past weekend, and today is going to be hot.  Ugh...

I had been asked by a few if I could share the dimensions for the wagon that I made so I want to post those.  it was extremely easy.  If you've made anything before this is just your basic box.  But, if any of you want a tutorial please just ask and I'll work one up...  So here goes...

You will take a piece of card stock, preferably red, that is 4" x 5" and score it at 1" on all 4 sides.  Cut at the corners up to the 1" score line and assemble the box together.  For the handle I took a piece of black card stock that was 1/2" wide to form a "T".  I actually started it under the wagon about a 1/2" and taped it up the front of the box.  The wheels are 1" black circles and 1/2" white circles.  I added an eyelet to the center and adhered them to the box.  For the back of the wagon I used my Modern Label punch that I punched out a piece of black card stock and added from scraps to form the "license plate".

If you have any questions, please just ask.  If you'd like an actual picture tutorial let me know and I can work one up.

I'm not sure if I will be posting tomorrow or not ~ it's my special day...  And yes, I'm getting old...  Having a teenager who reminds you does not help.  So if I'm not here I will be back Thursday!

Have a super great day!

Saturday, September 04, 2010

Paint your wagon

That's what I have for you today ~ a little red wagon.  I was thinking of things to make the other day and I wanted something to put cute little 3" x 3" note cards in and this popped into mind.  Isn't it adorable??  And when your cards are gone you can either make more or put little treats in it, paper clips, stamps - any little thing to keep on your desk.
The base of the wagon is Cherry Cobbler and I used Basic Black and some scraps.  The little note cards are made with Blue Bayou, Gable Green, Cherry Cobbler and some DP from Bo Bunny.  I tied some ribbon on each to dress it up a little bit.  If you notice the back of the wagon, I used my Modern Label punch and stamped the sentiment from The Angel Company Party Time set with black ink and attached it.  The wheels are made with Basic Black 1" circles with white 1/2" circles and I added an eyelet in the middle of them to jazz it up a bit.
Adorable huh??

I hope that each and every one of you have a safe and happy holiday weekend.  I'm sorry for the lack of posting this week, I've been busy with other things.  But I will see you back here next week!